How to disable the SIM error message on your Windows Mobile device
 Some people use Windows Mobile devices without a SIM. I use it to test different things during my job and also on my developer devices at home. I just started a little project where I want to use the Lumia 640 as a control device and these devices will never get a SIM. So this pesky little warning prevents the device from automatically starting up and run my control software.
Fortunately this is easy to fix. If you install the Imaging and Configuration Designer (ICD) you can set a configuration setting and provision your devices to this setting. Installing the ICD is easy. Instructions can be found here. The cool thing about provisioning package is you can mimic a lot of the more fancy Mobile Device Management features. So if you need to test deployment, settings like WiFi and email you can do that without any MDM server and just use provisioning packages. These packages are just a bunch of zipped up XML like any MDM syncml is as well. So easy to test your things without needing to go to the IT guy and ask him to setup some policies and you enrolling the devices in a work account.
The setting you are looking for is called AllowSIMErrorDialogPromptWhenNoSim under the experience group.
Since this is the first time I will show a step by step guide. Future posts will just mention the settings involved.
First you create a new project (File New Project). Enter the name RemoveSIMErrorDialogPromptWhenNoSim

Hit next and choose Provisioning package and hit next again

On the next screen choose ‘Common to all Windows mobile editions’ this will give us all the options available for mobile and not just a subset.

You can skip the page to import a provisioning package (or import my package linked to this blogpost to see what I did) and click Finish
In the search box type SIMerror and click on the AllowSIMErrorDIalogPromptWhenNoSIM and configure it to No.

Save your project and choose Export – Provisioning package. Leave the defaults and click Next (if you want to change your package the next time make sure you increment the version, otherwise your device won’t take the changes.

I leave the encrypt package and sign package checkboxes unchecked and click next.

Select the location where you want to store the provisioning package and click next.

On the final ‘build the provisioning package’ you click the build button.

And you are done. If you navigate to the directory you will find the RemoveSIMErrorDialogPromptWhenNoSim.ppkg file.
You can drag and drop the file to your connected phone in file explorer.

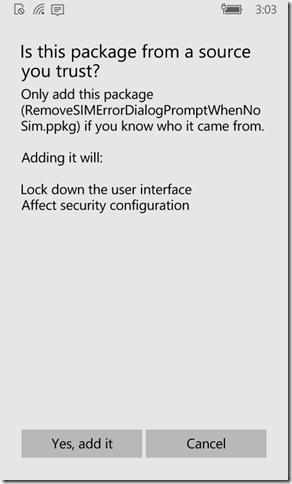
On your device you will see a message popup asking you if you trust the package which is trying to be installed.

If you click Yes, add it your device will be provisioned. If you reboot your device now you will not see the annoying screen anymore. Mission accomplished.
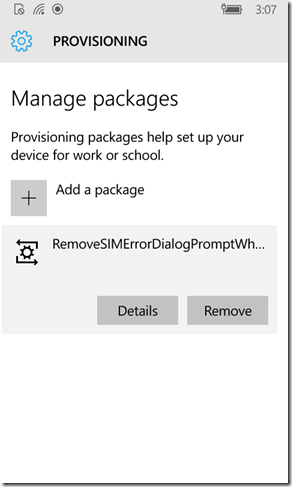
If you decide you want to remove the setting you can do that by going to the settings screen. Accounts, provisioning.

You can find this provisioingpackage over here. Make sure you check it before you install it since these packages are really powerful and can totally mess up your device settings.
Comments
Comment by Amit on 2016-02-01 22:14:35 -0800
Or you could get an Android 🙂